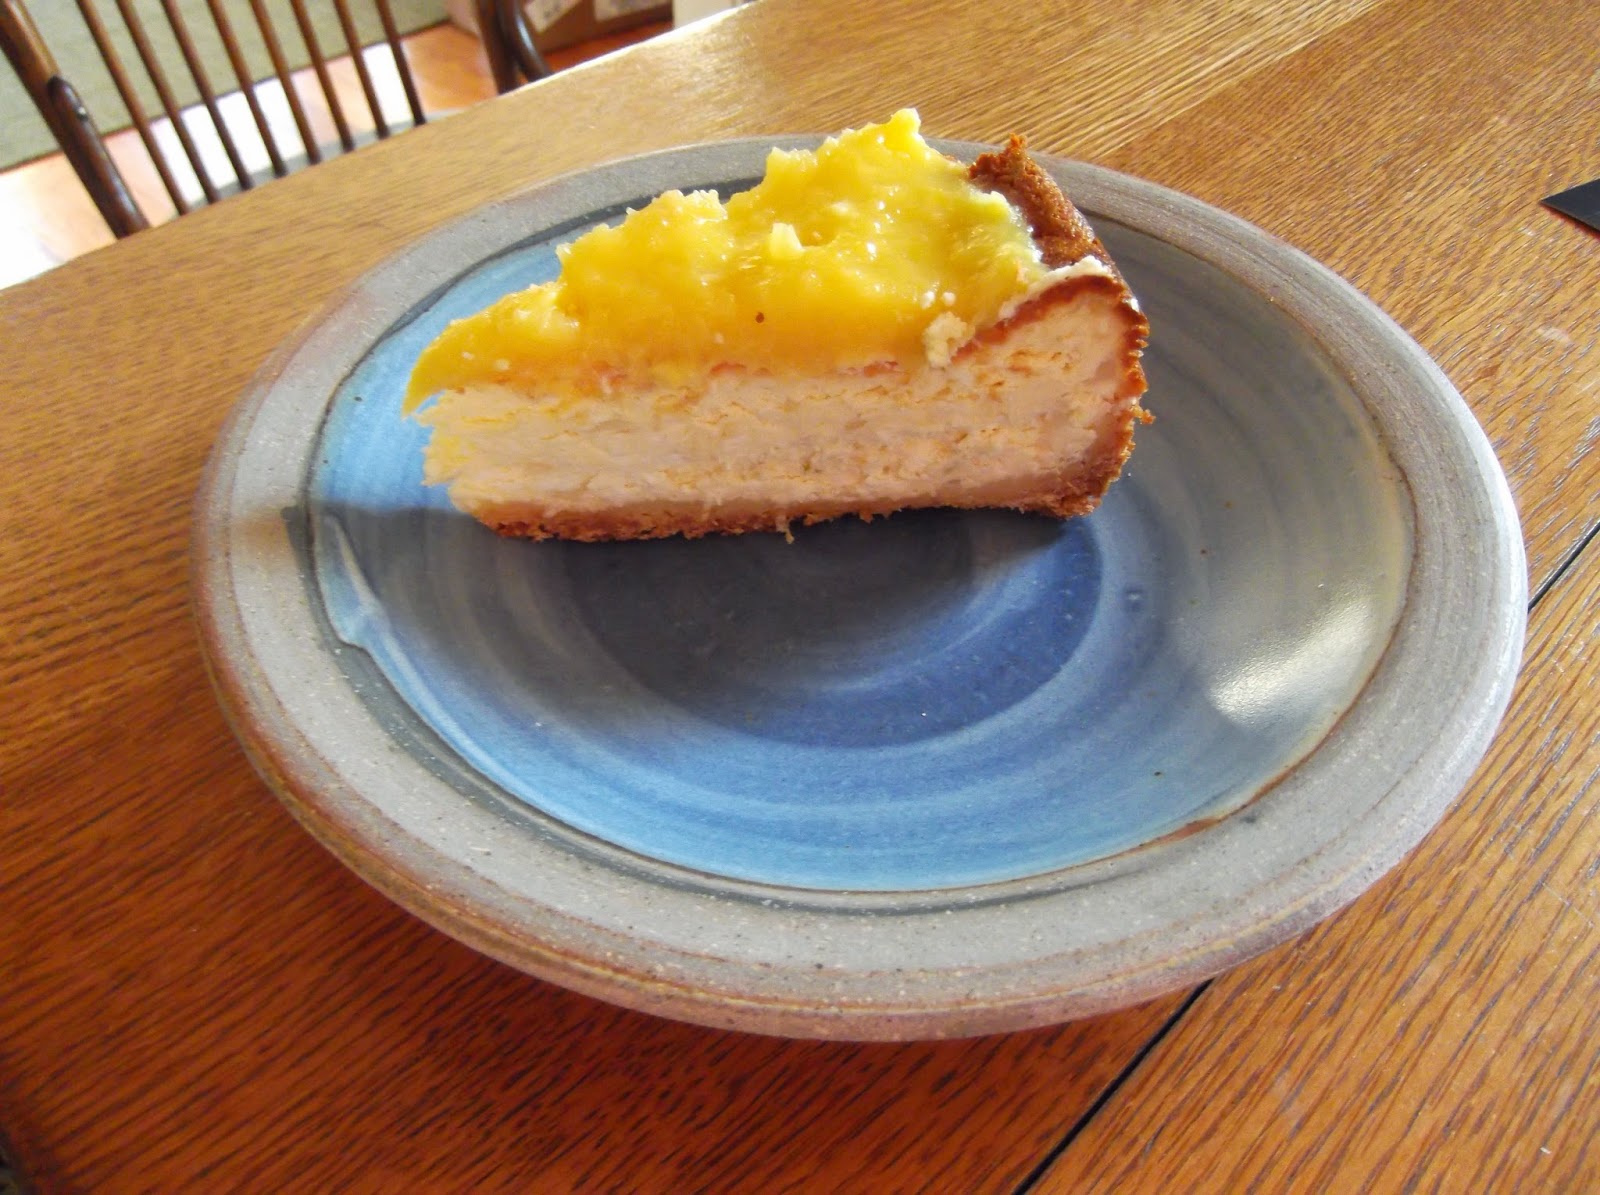
Showing posts sorted by relevance for query cheesecake. Sort by date Show all posts

Monday, June 9, 2014

Cheesecake Heaven

Almost twenty years ago, I baked a pumpkin cheesecake for a friend of mine. I followed it up with lemon cheesecake, plain cheesecake, chocolate cheesecake. I'm afraid I was a bit of a cheesecake tease.

He married me -- he says for my cheesecake. And then it all went bad.

My cheesecake-making abilities have ebbed and flowed over the years -- and mostly ebbed. Somehow I have not been able to achieve the height, the lightness, the ecstasy that I aim for. My best rendition in recent years has been the Goat Cheese Mascarpone Cheesecake with Rosemary Rhubarb Sauce (from Grid magazine in Philadelphia), which is totally awesome. (I've even made it with a gluten-free crust for my celiac friend.)

But mostly my cheesecakes have fallen flat. I've taken to cutting them into squares and calling them "cheesecake bars." It's humiliating.

One answer is simply more cream cheese. But that doesn't achieve the lightness I'm looking for. Another is to use a smaller pan -- I've even gotten extreme with a 7" springform pan for ultra-mini-cheesecakes. Which disappear quickly, of course (who can knock the ingredients?), but leave my husband looking around for another cheesecake muse.

And finally -- though I have cursed some of his recipes in recent years -- Mark Bittman came to the rescue yesterday.

A classic recipe -- and it worked!

Lemon Cheesecake with Graham Cracker Crust

About 3 cups of crushed graham crackers
Pulse in Cuisinart with about 10 T. melted butter
(Skip Bittman's 3 T. sugar)

Press into a greased 9" springform pan and preheat the oven to 325 degrees.

4 eggs, separated
3 8 oz. pkgs. of cream cheese
Grated zest and juice of 1 lemon
2/3 c. sugar (reduced from Bittman's 1 cup)
1 T. flour

Beat the egg yolks until light with a mixer or in the Kitchenaid mixer; add cheese, lemon zest and juice, and 2/3 c. sugar and beat until smooth. Pour out into another bowl (if you're using the Kitchenaid) and stir the flour in with a spoon. Wash the bowl and whisk up the egg whites until they hold soft peaks. Gently but thoroughly fold them into the cheese mixture (with a rubber spatula). Turn the batter into the pan and place pan in a baking pan large enough to hold it comfortably.

(This can be tricky -- I used a large flat Lodge enameled cast iron covered casserole. See above.)

Add as much warm water as you can to the larger pan -- you're baking the cheesecake in a water bath. (So your springform pan had better not leak -- I have a new one that locks very tightly.) Transfer carefully to the preheated oven and bake until the cake is just set and very lightly browned, about an hour.

Ideally (unless your daughter is baking lemon bars, which mine was), turn the oven off, take the cheesecake out of the water bath and return to the oven for at least 30 minutes to cool in the cooling oven. Then cool on a rack, cover with plastic wrap, and refrigerate until well-chilled before slicing and serving.

I had planned the cake for a meeting I was having at my house, but my clever daughter made me a deal -- she baked lemon bars for the meeting (we never eat them at our house -- too much sugar!) and we kept the cheesecake for the family. It was truly fantastic -- light and creamy and lemony and a little bit tart. Perfect crust -- not too hard to cut into, as they sometimes are after an hour in the oven, not too sweet, since I omitted the extra sugar. Everyone was delighted -- and couldn't wait for breakfast this morning.

Marriage saved. For now.

Thursday, April 10, 2014

Avoca Cafe Cheesecake ... in Ohio

My friend is Irish, and she swears by the Avoca Cafe Cookbook. One evening last fall she went on and on about the recipes, about how this was such a great place to go in Ireland, about how this is the only cookbook she uses. So I bought a copy and gave it to my sister for Christmas.

(My sister's husband's family comes from Ireland originally, though their roots in Ohio run pretty deep. Plus they eat meat -- and this is not a vegetarian cookbook. She has tried the Beef and Guiness stew and found it delicious, if extremely rich.)

Then last week, my friend stopped by to invite us to a dinner party and dropped by some cookbooks for me to peruse. (She must have heard of my "guilty habit" of reading cookbooks.) Two Avoca Cafe Cookbooks, and a cake cookbook called Miette. (That one is fantastic. But so far I've only drooled over it -- haven't tried anything yet.) The Avoca cookbook really is wonderful, As most cookbooks do, it starts with the soup section, and I want to try every single recipe. Just my luck that the weather is finally turning to spring...

But then my daughter requested a cheesecake for her birthday. And this presented a certain challenge. Even though my husband swears he married me for my cheesecake, I've been having dubious success over the last few years. Generally when I bake one, I just call it a "cheesecake tart," or I cut it up into "cheesecake squares." In other words, my cheesecakes in recent years have been seriously lacking in height.

And I've tried. I've tried the very slow baking -- 1 1/2 hours at 200 degrees. I've tried leaving the cake in the oven for several hours after it is done, door lightly propped open with a wooden spoon to keep it from falling. But these techniques have failed me ... so far.

The real answer, it seems to me, is to get a 9" or even a 7" cheesecake pan. Or I suppose I could double the recipe. In preparation for the birthday cake, I went to several kitchen shops on Monday and found them all closed; I checked the Macy's on the way home from work, but no luck. No 7" pan was in my (near) future. (I admit it -- I have one on order.)

So I decided to wing it -- from the Avoca Cafe cookbook.

The recipe is unusual, AND it's Irish. So our standard quantities and ingredients don't map onto it perfectly. Since I was determined to have a cheesecake that was higher than an inch, I figured I'd just guess -- substituting ingredients and fudging quantities -- and hope for the best.

Baked cheesecake with lemon topping (modified)

Filling:
1 container small curd cottage cheese (do they come in 15 1/2 oz. containers?)
4 eggs
~2/3 c. white sugar (who has "caster sugar"?!)
16 oz. cream cheese
3 T. corn starch (almost forgot this and added it last -- in Ireland it's called "cornflour")
juice and grated peel of 1 lemon
juice and grated peel of 1 lime
4 oz. melted unsalted butter
2 small containers of heavy whipping cream (no creme fraiche at our country grocery store, and only after I poured the cream in did I look it up on the web, which suggests half as much whipping cream as creme fraiche if you're substituting... oops...)

Crust:
~1 1/2 c. flour
~2/3 c. sugar (this may have been too much -- remember, I was experimenting, and not actually doing the math...)
1 egg
5 oz. soft unsalted butter (okay, maybe it wasn't all that soft...)

Mix all crust ingredients in a food processor. Press half into a greased and lined 10" springform pan (that's all I have at present!) and bake for 10 minutes at 375 degrees. Let cool slightly and press the remaining crust dough on the sides of the pan. In the meantime, lower the oven temperature to 300 degrees.

For the filling, whiz the cottage cheese in the food processor for 20 seconds. I also used my kitchen aid mixer with the whisk attachment, whisking eggs and sugar together for 5 minutes. At this point I think I should have changed to the beater, but I didn't, and just added the cottage cheese and cream cheese. After a bit (and I'm sure the cream cheese was not mixed in properly, but oh well) I added the lemon and lime juices and rind (the recipe calls for zest, but my zester is in my PA kitchen, so I simply grated the rinds). Stir in the melted butter and whipping cream (better 1/2 pint than a whole pint, but I thought of that later, so it was pretty liquid-y!). Which is why when I remembered about the corn starch, I added 3 T. With only 1/2 pint of cream, I would have used 1 T.

Pour the mixture into the pan and bake in a 300 degree oven ... for two hours? When I read that, I reduced my oven a little part of the way through, to about 275. My oven runs a bit hot anyway. The top was definitely browned when I took it out! Leave to cool and chill overnight.

Then the fun part -- today I made the lemon curd after work. Delicious!!

Homemade Lemon Curd

Juice and grated rind of 3 lemons
4 oz. unsalted butter, diced
2/3 c. sugar (who has caster sugar?!)
5 eggs

Put the lemon juice and rind, butter and sugar in a large bowl set over a saucepan of simmering water, making sure the water does not touch the base of the bowl. Leave until the butter has melted and the sugar dissolved, stirring occasionally.

Lightly whisk the eggs, then pour them onto the mixture through a sieve (that was fun!). My glass bowl and Ikea small pasta pot combo worked perfectly, and eventually most of that egg did get through the sieve and into the lemon mixture.


Leave for 40 minutes to 1 hour, stirring occasionally with a wooden spoon. The curd is ready when it's thick enough to coat the back of the spoon. Remove from the heat. (I was making a half recipe; if you did the whole recipe it would probably make 2 pint jars and you could can it.)

This recipe was super easy -- I could essentially do all kinds of other things (like make the birthday dinner of Pad Thai) while it cooked. And it is so tasty! I can't believe I never tried to make it before. I let the lemon curd cool a bit and then spooned it on top of the cheesecake. Which was plenty high -- probably because I doubled all the cheese quantities!

I am happy I have somehow convinced my daughter that cheesecake is the best birthday cake. Tonight reminded me of how fun her birthday was two years ago when we had a bonfire in the backyard and girls running all over -- jumping on the trampoline, zipping across the yard on the zipline, and everyone eating cheesecake. But tonight's cheesecake deserved the name and made the birthday really special. Light and yet dense -- how can that be? And not too sweet -- especially the lemon curd. Yum.

Tuesday, July 22, 2014

Cheesecake in July

It is almost impossible to bake in the summertime. We don't have whole house air conditioning, and besides, I refuse to heat the house from the inside while it's heating from the outside!

But this summer (so far) has been fairly lovely, and so on Saturday I ventured to bake a cheesecake. Anyone following this blog knows that I have declared the "perfect cheesecake" not once, but twice in recent months. And yet...

Lemon Cheesecake with Ricotta
(on the right is my personal recipe file project, still ongoing!)

Apparently, I need to fiddle with perfection. This weekend I made Mark Bittman's Lemon Cheesecake, but with twists. For the crust, I used Trader Joe's Triple Ginger Cookies (yum!). This was brilliant, a nice change from a straight graham cracker crust. The other innovation was to substitute ricotta for some of the cream cheese -- I used 15 oz. of whole milk ricotta with two 8 oz. packages of cream cheese. I didn't adjust the eggs, and perhaps I might have, but the happy noises coming out of my family's mouths last night confirmed that the ricotta added a certain lightness to the cheesecake. Again, yum.

The best part about cooking and baking, though, beyond the taste sensations exploding in the mouth, is the effort that goes into it. The same day I made a Quinoa Corn Feta salad (adapted from Rachel Ray) and a peach salsa for the bluefish we were grilling, and all that chopping and stirring was positively therapeutic.

Most importantly, for the cheesecake I needed lemon juice AND lemon rind. I walked down to the corner to buy the lemons at our bodega (a nice feature of city life), and then I rifled the drawers looking for my lemon zester.

I don't have a lemon zester in my other kitchen, so only in summer can I replay in my head that scene in the Brooklyn apartment of one of our favorite relatives. "A zester!" I exclaim. "I've always wanted a zester!" "Here, take it," says Uncle Roland. "No, really, I couldn't!" I retort, embarrassed. "Seriously, I've only used it once or twice myself. Take it, and you'll think of me when you use it."

How great is that for a dessert in mid-July? This recipe brought together creativity, fresh ingredients, the convenience of life in the city, the fun and precision of separating eggs, measuring and mixing, plus a chance to use my lemon zester and think about its provenance. Not bad for an experience -- and at the end there was cheesecake.


Thanks, Roland.

Monday, August 11, 2014

The Perfect *Ricotta* Cheesecake

Okay, so I've perfected my summer cheesecake: light and fluffy, AND I get to use Uncle Roland's zester, AND it helps to have access to my 9" springform pan (and to Trader Joe's or Whole Foods for the ginger snap cookies -- though I imagine any cookies would do).

In short:

Lemon Ricotta Cheesecake with Ginger Snap Crust

Take about 2 cups of crushed ginger snaps and pulse them in a Cuisinart with about 6 T. melted butter. Press into a greased 9" springform pan and preheat the oven to 325 degrees.

5 eggs, separated
2 8 oz. pkgs of cream cheese
1 15 oz. container of ricotta
grated zest and juice of 1 lemon
2/3 cup sugar
1 T. flour.

Beat the egg yolks until light with a mixer or in the Kitchenaid mixer; add cheeses, lemon zest juice, and 2/3 c. sugar and beat until smooth. Pour out into another bowl and stir the flour in with a spoon. Wash the bowl and whisk up the egg whites until they hold soft peaks. Gently but thoroughly fold them into the cheese mixture (with a rubber spatula). Turn the batter into the pan and place pan in a baking dish large enough to hold it comfortably. Add as much warm water as you can to the larger pan; you're baking the cheesecake in a water bath. Transfer carefully to the preheated oven and bak until the cake is just set and very lightly browned, about an hour.

NOTE: This summer I have used my cast iron frying pan for the water bath, which has worked brilliantly.

Turn the oven off, take the cheesecake out of the water bath, and return to the oven to cool for 30 minutes to an hour. Then cool on a rack and refrigerate until well-chilled before slicing and serving. (Unless your family is too impatient. Then explain to them as they are eating how much better it will taste on the next day.)

No huge innovations here -- I am happy with the ricotta substitution and increasing the eggs to 5, which makes the cake light and high, and I've adjusted the crust to get the right proportions. This might be yummy with ginger instead of lemon in the cheesecake -- I'll try that this autumn.

For Tucker and Kayty -- enjoy!

Wednesday, December 31, 2014

Summing up: 2014 comes to an end

And thus must end the 2014 recipe project!

It was an interesting year. I think that the project was in part motivated by my friend who has celiac's disease -- a desire to be able to modify recipes for her morphed into a desire to modify and chronicle many of my cooking and baking adventures.

For Christmas I was in the kitchen, but not baking -- I made a traditional meal on Christmas eve for my parents (turkey, mashed potatoes, green beans, cranberry sauce), and a French meal on Christmas day (bourride [a fish stew with aioli], tartiflette [a bacon, potato and cheese casserole -- with a vegetarian version for some of us], asparagus and salad). My daughter did all the baking -- cream puffs on the eve and lemon bars on the day. I did make a version of my mom's coffeecake for the next day, but I felt a serious lack of baking over the holiday season. Travel was part of the reason, and a general busy-ness another.

New Year's Eve Baking Mania
So for new year's -- a baking mania came upon me. I made my favorite Christmas morning thumbprint cookies (funny that the recipe title from the NYTimes somehow gives me license to eat them for breakfast!), plus my grandmother's Rice Krispie Treats, and then a new cappuccino cheesecake and Mme. Sandberg's Mousse au Chocolat (from 8th grade French class!).

A fitting end to a year of baking and cooking. My conclusions:

Gluten-Free: the best way to treat gluten-free friends and relatives is with actual gluten-free recipes, including Rice Krispie Treats and chocolate mousse. Both of these recipes are from my childhood, and they really take me back. (See below.) It is also possible to serve cheesecake, and though over the year I have made many lemon and chocolate cheesecakes (and have thought about pumpkin cheesecake, the original recipe I made up and used to lure my future husband into my kitchen), it's fun to do something new. ("Really, mom, you're making a brand new recipe to take over to your friends' house for New Year's Eve? Is that wise?") Usually with cheesecake I try to substitute something for the flour that is in the cake itself, and assume my celiac-suffering friend will avoid the crust. Yesterday I bought gluten-free graham crackers -- I hope it wasn't a mistake!

My daughter bought the cutest little ramekins:
perfect for the portion control project!
Portion control: While I am committed to my general rule of halving the sugar, I have gotten complaints from various relatives that my cookies and pies aren't sweet enough. (My children assure me that they are wrong.) So another tactic is to come closer to the actual recipe, but just serve everything in tiny portions. This worked with our "test" of the chocolate mousse this afternoon.

With cookies of various kinds, this is harder, especially if you work at home. I've managed to hide cookies from the adults by putting half of every batch into the freezer ... but my teenaged son is perfectly willing to raid the freezer and eat all the cookies before we notice. So I guess half recipes, giving some away, and careful hiding will have to suffice if I want to bake cookies.

[Sometimes] be true to the recipe: Until I found my grandmother's recipe card for the Rice Krispie Cookies, I had completely banned this from my kitchen. But the gluten-free friend, and the memories of my gramma always having cookies available, reminded me that this is a recipe that really keeps. Thanks, of course, to that very modern invented food that has turned Americans fat -- corn syrup. In the beginning of this year, I made these with less sugar and less corn syrup. But then they don't hold together! And as I worked with the recipe, I realized why the chocolate layer (the thing that made my gramma's Rice Krispie Treats better than all others) got thinner and thinner over the years. My grandmother, bless her heart, was economizing -- modifying the recipe to make it more reasonable. An entire bag of chocolate chips plus an entire bag of butterscotch chips means that this recipe is both expensive and very caloric. Even so ... I think that with the portion control rule in place (I cut them in thinner rectangles instead of in squares), I can remain true to the recipe itself, while remembering how my gramma economized and being amused by her balancing the need to provide for the grandkids against the realities of increasing costs at the grocery store.

Experiment. While the fun of dipping into my great-aunt Del's 1960s recipe box, and of reliving recipes from my childhood, cannot be beat, it is also excellent to surf the web and troll the newspapers and/or cooking magazines. Some of my best recipes are from cookbooks -- I have one I keep only for the Carrot Cake recipe. So much of the 2014 recipe project was about expanding my horizons, while also regularly returning to memory lane. It has, I think, been a success.

Rice Krispie Cookie

[butter the bowl -- this is key, and it is written in pencil on the back of my recipe card, which is not at all helpful!]

1 cup sugar
1 cup light Karo syrup

Bring to boil, remove from fire, add 1 cup peanut butter. Stir until dissolved.

Pour this hot mixture over 6 cups of Rice Krispies. Mix well. Spread and put down in a large pan.

("I use my dripping pan roaster," says my gramma; really any cookie sheet will work.)

[Don't worry about reaching the edges of the pan.]


In the meantime, have melting on stove over hot water (or on low flame without a double boiler):
butterscotch and chocolate chips!
1 pkg. butterscotch chips
1 pkg. chocolate chips
1 T. salad oil [just the words "salad oil" evoke the 1970s!!]

When thoroughly melted, blend well and spread over top of Rice Krispie mixture.

From Em, January 1966

Yes, I had a Great-Aunt Em. And my gramma had a box of this in her house always. They can't last that long here, but I've made them to celebrate the end of 2014, a year when I thought a lot about Aunt Em, Gramma, and many others as well.

[important to cut these within about 30 minutes -- otherwise they get too hard! my note, not Em's or Gramma's]

Mousse au Chocolat (à la Mme. Sandberg, 1978-79)

12 oz. bag chocolate chips, melted on low heat [allow to cool]
2 T. sugar -- dissolve in 4 T. boiling water
Beat 4 egg yolks.
Add sugar and water to yolks.
Beat chocolate and eggs together.
Beat 4 egg whites until stiff.
Fold egg whites into chocolate mixture.
Add 1 cup whipped cream.
Allow to cool.
Serve with whipped cream!!!

Cappuccino Cheesecake

[This recipe has been in my file forever, printed out from the internet, don't remember where. But I've modified it, of course!]

Box of gluten-free graham crackers
5 T. melted unsalted butter
1/4 c. sugar

Mix crackers, butter, and 1/4 cup sugar in Cuisinart and pulse until they form crumbs. Press onto bottom (and/or sides, depending on how much you have) of 9" diameter springform pan. Bake crust at 350 degrees for 10 minutes. Cool. Maintain oven temperature.

1/2 cup whipping cream
4 t. instant espresso powder
1 1/2 t. vanilla extract

Combine in small bowl; stir until powder dissolves; set aside.

4 8 oz packages of cream cheese at room temperature
4 large eggs
2 T. flour (or cornstarch for the gluten free variant!)
1 cup semisweet chocolate chips.

Cappuccino Cheesecake -- reviews not yet out!
Using an electric mixer or Kitchenaid, beat cream cheese until smooth. Gradually beat in about 1 cup of sugar, then eggs one at a time. Beat in flour or cornstarch. Beat espresso mixture into cream cheese mixture. Stir in chocolate chips. Pour batter over crust.

Place into a water bath if you can (see my other cheesecake recipe for this). Bake until edges are puffed and center is just set, about 1 hour +. (I reduced the oven to 300 degrees about halfway through.) Cool on rack 30 minutes; chill cake uncovered until cold, about 6 hours. Cover, keep chilled at least 1 day and up to 2 days.

Cut around cake to loosen. Release pan sides.

Christmas Morning Thumbprint Cookies

[From the New York Times, at least 12 years ago -- I had been looking for a recipe like this for years. Way better than what you can buy at Trader Joe's!]

1 cup unsalted butter, at room temperature
2/3 cup granulated sugar
2 egg yolks
1 t. vanilla (or lemon extract, if your daughter used all the vanilla without replacing it)
2 cups flour
1/2 cup fruit jam of choice -- I prefer raspberry and apricot, though this year made do with blackberry and strawberry, since that's what we had

Heat oven to 350 degrees.
With a wooden spoon, beat the butter and sugar until creamy. Beat in the egg yolks, one at a time, and then the vanilla. Beat in the flour a half cup at a time.
Roll dough with your hands to form a snake, then pinch off about 1" at a time. Roll each into a ball and place on cookie sheet. Press each ball with a thumb to form a deep crater.
Spoon a little jam into each crater.
Bake until edges start to brown -- 16-18 minutes, but be careful [mine took about 14 minutes this year].

Friday, November 28, 2014

The Un-Thanksgiving -- Hijacked by Cook's Illustrated

Several weeks ago, we noticed that we had failed to commit to a plan for Thanksgiving.

We almost never travel (can't face the traffic), but since Thanksgiving is my favorite holiday, we instead try to lure relatives out our way. My brother-in-law is from near here, so sometimes he and my sister stop by; Steve's brother recently married a woman who used to live in our little town, and we had our fingers crossed that they might come again this year. And sometimes my mom makes the trip up from Virginia. We then fill in with graduate students, colleagues (often European), and other friends who might not have somewhere to go. I aim to invite people of all ages, but especially children. We try to fill up the house -- my ideal is 16, 18, 22.

We've only ever hit 22 in Philadelphia, because we have even more relatives on the east coast -- several generations worth -- and we managed to score our upstairs neighbors as well as a Chinese graduate student to add to the mix. For that epic Thanksgiving we threw the children, and the exchange student, into the car and drove to Philadelphia on Tuesday, cooked and baked all day Wednesday (can you say "manic baking"?), ate and ate (and played ping pong) on Thursday, went sightseeing with our exchange student on Friday, and drove home on Saturday.

But generally, we like to stay put. And this year, it was just going to be the four of us. Which seemed kind of sad and pathetic. We thought of inviting ourselves over to one or another friend's house, but in the end I said: "let's go to Great Wolf Lodge." For us, this was kind of funny -- it's not the sort of thing we do. But it was terrific. Comfy beds, big room, charades and Malaysian take-away to offset the kitsch and the water park, which were also fairly awesome, each in their own way. Our son said "here we are staying at Great Wolf Lodge ironically, but these rides are so great I'm not sure I'm being ironic anymore." That was our Wednesday night -- and then we drove back home.

Recently subscribed -- I'm loving it!
For the day itself, we had planned to grill salmon and make mashed potatoes. And that was supposed to be it. But instead, someone asked whether I would make my sister-in-law's Korean spinach, and I started pulling out cookbooks, including some new issues of Cook's Illustrated.

After all, we needed something green. Instead of Korean spinach, I found a recipe for a portobello mushroom and leek crostada (to which I added piave on top instead of gruyere), and a great butter lettuce salad with radishes, toasted walnuts, and a delicious yogurt-dijon-shallot dressing. And as long as the wood stove was going, we threw on some apples and made fresh applesauce. 

All of a sudden our "un-Thanksgiving" turned into quite a feast. Steve had to grill the salmon in the dark and cold, but that was half of the fun. It was delicious.

This issue was too tempting!
And tomorrow we have Thanksgiving do-over -- a tradition with some of our Ohio friends who spend the holiday with family, but want more leftovers than that. I'll be making my mom's crescent rolls and her country apple-cranberry sauce, plus my own special tradition. Years ago I decided that it isn't really a holiday without chocolate, so I make something every year -- flourless chocolate cake, chocolate biscotti, or in this case, milk chocolate cheesecake.

I can still see my husband's cousin in our pantry many years ago, chowing down on the chocolate cookies I was using for the crust for my first ever Thanksgiving chocolate cheesecake. And the pies coming down the stairs and in the front door another time to make the dessert table groan -- pumpkin pies, sweet potato pies, apple pies, flourless chocolate cake, and the cranberry walnut cake my daughter made that year, tempted herself by the cover of Better Homes and Gardens

I sure do love this holiday.

Tuesday, December 31, 2013

Three-Cheese Dill Buttermilk Biscuits

One of my challenges for 2014 is to fiddle with recipes. Always one to be a bit too literal, I'm hoping to experiment, combine, alter, and otherwise "doctor" my recipes and document those efforts here.

Yesterday I prepared my new year's dessert, an attempt to recreate a version of the pomegranate seed/cream cheesy/chocolate tart we loved at the Ministerstwo Kawy in Warsaw. I wanted to make it gluten-free to accommodate a friend with whom I'll spend new year's eve. So I made a version of my flourless chocolate cake and baked it for about 15 minutes, then spread a cheesecake filling on top. Reviews tomorrow if it comes out, and I'll concoct a recipe for it.

In the meantime, for breakfast this morning to try to lure my son (who just got the spacers for his braces and has a sore mouth) into eating, I made Three-Cheese Dill Buttermilk Biscuits. The goal for the past few days is to use up what is in the house (after the orgy of spending that inevitably occurs at the holiday season, it's nice not to go to the store!) while still making yummy meals. When modifying my recipe (for Cheddar Buttermilk Biscuits, from Epicurious) I made about half, since there are only three of us at home this morning.

Ingredients:
about 3/4 cup regular flour
about 1/3 cup cornmeal
2 t. baking powder
1/2 t. baking soda
1/2 t. salt
1/2 stick of cold butter
grated cheese -- whatever is available (I used cheddar, romano and muenster, about 1 cup in total)
chopped dried dill (because I didn't have any scallions)
2/3 c. well-shaken buttermilk

Drop in spoonfuls onto buttered baking pan and bake at 450 degrees for about 12 minutes. Makes 8 medium biscuits.


Reviews:

Not bad. A little salty, maybe because I only had salted butter. Next time I would leave out the salt, or use unsalted butter.

I now note that I could have used half that quantity of butter -- the original recipe called for 1/2 a stick, not 1/2 a cup as I thought. I can't really taste the dill, so I guess I should have added more.

With fruit and yoghurt, this could be a delicious breakfast, or for dinner with chili.

Wednesday, November 19, 2014

Broccoli Corn / Savory Frank Noodle Bake?

So my husband maintains that "bake" is not a noun. And he may be right.

But I was going through my Aunt Del's recipe box and found two promising recipes, circa 1968 and 1967, the first from someone named Maude Buckley and the second from Better Homes and Gardens.

I mean "promising" in the late '60s housewife sense. Lots of short cuts, cornflake or cracker crumb toppings, "cut into wedges and serve."

Why not? I survived the late '60s. My kids will too. In fact I doubt my mom ever made these kinds of recipes, but I remember clearly going to Florida to see my Aunt Em and begging her, every year, to make her "cream corn casserole." The spécialité de la maison, so to speak.

I occasionally buy canned creamed corn (a habit from childhood), but I never use it. It sits on the shelf for a year or so and then I donate it to a food bank. When you think about it, it must be the sugar that made that casserole so appealing to ten-year-olds.

After all, according to a reviewer on amazon.com, cream style corn is the best:
I love that the ingredients are simple - Corn, water, sugar, corn starch and salt - and that the corn is grown and packed in the USA. The cans are large enough to make a cornbread/egg/cheese casserole for our big family. I also add it to regular cornbread because it makes it moist, delicious and less crumbly.

 Good ideas, I am sure. But instead of making the Brocolli Corn Bake (that's how Aunt Del spelled it -- broccoli was still a foreign vegetable in those days, I imagine) with its "1 1 lb. can creamed style corn," I decided to merge two recipes and see what happens.


Here's the new recipe:

Broccoli Corn Savory Frank Noodle Bake

16 oz. egg noodles, cooked
1 medium onion, chopped and sautéed in 1 T. butter
1 16 oz. container of cottage cheese
1 16 oz. container of sour cream
4 eggs, slightly beaten
1 t. salt
1/2 t. pepper
1 16 oz. package of frozen broccoli, thawed
1 10 oz. package of frozen corn, thawed
1/2 cup cracker crumbs mixed with 1 T. melted butter

I made two versions, one with beef franks (4-5) and one with tofu kielbasa. Mix the ingredients together, add cut up hotdogs, top with cracker crumbs (I also added some shredded cheddar cheese that was left over from the other night), pour into a small greased glass casserole, and bake ~20-25 minutes in a 325 oven. (You could use a hotter oven, but I was also baking a cheesecake.) Near the end you can add some reserved hot dog pieces to the top for garnish!


 Review to come. Dinner time.

Friday, January 3, 2014

New Year's Scrambled Egg Pizza

So for new year's we made homemade pizzas, but some of our guests didn't make it, so I had extra pizza dough and other ingredients left over.

This morning (or, to be honest, this noon) when I dragged my 13-year-old son out of bed on his last day of winter break, I made him a scrambled egg pizza.

I remember when I was in Russia, pizza had recently arrived. Eating out had mostly been either cafeteria-style or banquets in the Soviet Union, and informal cafes where you might get a meal were new, especially exotic ones. I went to one pizzeria on ul. Rubinsteina in 1987 and I recall that we stood in line on the sidewalk for quite a while to get in. But then in 1988-89 there was a pizzeria not far from my institute on ul. Volgina, so we went there fairly frequently, especially with out-of-town guests.

We marveled at the crazy ingredients -- ham, for example, or chicken and hard-boiled eggs. As Americans, we thought we knew the "right" way to make pizza. But we were wrong.

New Year's Scrambled Egg Pizza

Drizzle a pizza crust with olive oil and bake at 550 for 8 or so minutes.

In the meantime, slice some small potatoes thinly and cover with water in a saucepan. Bring to a boil. Fry in butter in a cast iron pan (it's good to add iron to your diet!) for 4-5 minutes a side. Add half a diced onion.

The left side has the chicken for the boy, and the right side is vegetarian...
Take the pizza out of the oven and let it cool a little. Spread some sour cream on it, then some shredded cheese (I had about 3/4 c. of mozzarella). Sprinkle with dried basil, salt and pepper. Add a layer of fried potatoes and onions, then more basil.

Scramble four eggs in butter and add to the pizza. Salt and pepper to taste. At this point I also added chicken to one half of the pizza -- left over from the salad I had out at a Mexican restaurant last night and packed to go home to add protein to meals for my growing boy...

I had a fresh mozzarella ball, so I sliced half of it to add to the top of the pizza, then heated in the oven until the cheese melted, about 5 minutes.

Yum.

Reviews: definitely delicious. I am hoping to go cross-country skiing in the brilliant sunshine this afternoon, so I will burn off some of those cheese and sour cream calories, but I am happily sated, and so is the boy.

My photography will improve, I hope. My son tried to express sadness that I will have to make my New Year's Eve cheesecake again, since we ate it without taking a picture. Now that was delicious.

Sunday, October 5, 2014

Gluten Free Chocolate-Espresso Cookies

Baking gluten free is tricky. But when your best friend discovers she has celiac disease, and somehow you don't want to ice her out of social situations because of it, you have to adapt. And adapt your recipes.

The Epicurious "Chocolate-Espresso Cookies" recipe (originally from Bon Appetit in July 1997) adapts well if you remember the most important gluten free rule: your baking time needs to be significantly shortened. (I learned this the hard way trying to make gluten free cheesecake crusts using Pamela's GF baking mix. Threw several cheesecakes away before I adjusted. But it's also a lesson that needs repeating -- it's too easy to blindly follow the recipe.)

So here's a new version of the recipe with the lack of gluten in mind:


Gluten Free Chocolate-Espresso Cookies

Ingredients:
  • 6 T. almond meal (that's what I used -- I bet you could experiment)
  • 1/4 t. salt
  • 6-8 oz. baking chocolate -- a mixture of unsweetened and semi-sweet, broken up
  • 1/2 c. unsalted butter
  • 2 large eggs
  • 1/2 to 3/4 c. sugar (I err on the less sweet side generally)
  • 2 1/2 t. instant espresso powder
  • 2 1/2 t. vanilla
  • 1 cup semisweet chocolate chips
  • 1 cup chopped walnuts

Preparation:

Preheat oven to 350. Mix almond meal and salt together in a small bowl. Stir baking chocolates and butter in a heavy large saucepan over low heat until melted. Remove from heat. Use a hand mixer or Kitchenaid to beat eggs, sugar, espresso powder and vanilla until well blended. Stir egg mixture into warm chocolate mixture. Stir in dry ingredients. Stir in chocolate chips and chopped walnuts.

Immediately drop dough by heaping tablespoonfuls onto non-stick baking sheets (or use parchment paper), spacing 1 1/2 inches apart. Bake until tops crack but cookies are still soft inside (about 7 to 9 minutes -- make sure to check so that they don't burn!). Transfer baking sheets to racks; cool 5 minutes. Transfer cookies to racks (carefully so they don't break!); cool completely.

Things to keep in mind:
  • Let your chocolate mixture cool if you want the chips to retain their integrity -- if you put them in too soon they will melt!
  • Since GF cookies tend to spread, it may be worth just letting the chips melt and grinding the nuts rather than leaving them "coarsely chopped." You get the taste without the idea of nuts -- and frankly, when my cookies are tending toward the lace-thin, individual pieces of chips and nuts may make them break more easily.
  • Baking time: The original recipe (with 6 T. flour instead of the almond meal and 1/4 t. baking powder) calls for a 12 minute baking time. Know your oven, and experiment with your GF timing.
  • Also, if your cookies turn to crumbles, it's no terrible loss -- they are fabulous sprinkled over vanilla ice cream.
Pretty delicious.

Wednesday, June 18, 2014

Fundraiser for the Library?


I've been living in Greene County for almost 10 years now. I never quite know where I am, and now I see why -- whoever drew this county was a little tipsy. Slightly off-kilter. And having the Wright-Patt Air Force Base just confuses things further. Wherever I drive, I'm sure to end up in Beavercreek. When I merge onto I-70 I always remind myself: Dayton is West, Columbus is East.

So I try to do most of my traveling on foot or by bicycle. I stay in town whenever possible.

The other day I went to visit a neighbor. We had some business to contract, but she wanted me to come at 9 rather than 10. When I got there, I realized why.

She had baked a sweet bread to share with me over a cup of coffee.

In some ways, she reminds me of my grandmother -- ready to volunteer when called upon, living in a house filled with memories, and dipping into them occasionally to share.

In this case, the recipe was Lemon Yogurt Coffee Cake. She even had a xerox of the file card to give me when I expressed enthusiasm. (It was delicious -- especially because she toasted the slices in the toaster oven. Made it quite special.)

The best part, though, was the recipe card. Many people wouldn't recognize the homegrown effort of what was many years ago a fundraiser for the Greene County Libraries.

Typed recipe cards, reproduced and strung together with a shoestring. Yep, like a card catalogue. Very old school.


I have some ideas for how to modernize this recipe, but I haven't gotten to it yet -- we baked another Lemon Cheesecake (gluten-free this time) and have been reveling in it.

But the Lemon Yogurt Coffee Cake is next on my list of baked goods. And when I bake it, I'll think about the way libraries used to be. Card catalogues were awesome. In fact, when I visit the public library in St. Petersburg, Russia, I can lose myself in the card catalogue -- sometimes I don't even need to request the books.

Greene County library card catalogues ... no longer in use.