Wednesday, June 18, 2014

Fundraiser for the Library?


I've been living in Greene County for almost 10 years now. I never quite know where I am, and now I see why -- whoever drew this county was a little tipsy. Slightly off-kilter. And having the Wright-Patt Air Force Base just confuses things further. Wherever I drive, I'm sure to end up in Beavercreek. When I merge onto I-70 I always remind myself: Dayton is West, Columbus is East.

So I try to do most of my traveling on foot or by bicycle. I stay in town whenever possible.

The other day I went to visit a neighbor. We had some business to contract, but she wanted me to come at 9 rather than 10. When I got there, I realized why.

She had baked a sweet bread to share with me over a cup of coffee.

In some ways, she reminds me of my grandmother -- ready to volunteer when called upon, living in a house filled with memories, and dipping into them occasionally to share.

In this case, the recipe was Lemon Yogurt Coffee Cake. She even had a xerox of the file card to give me when I expressed enthusiasm. (It was delicious -- especially because she toasted the slices in the toaster oven. Made it quite special.)

The best part, though, was the recipe card. Many people wouldn't recognize the homegrown effort of what was many years ago a fundraiser for the Greene County Libraries.

Typed recipe cards, reproduced and strung together with a shoestring. Yep, like a card catalogue. Very old school.


I have some ideas for how to modernize this recipe, but I haven't gotten to it yet -- we baked another Lemon Cheesecake (gluten-free this time) and have been reveling in it.

But the Lemon Yogurt Coffee Cake is next on my list of baked goods. And when I bake it, I'll think about the way libraries used to be. Card catalogues were awesome. In fact, when I visit the public library in St. Petersburg, Russia, I can lose myself in the card catalogue -- sometimes I don't even need to request the books.

Greene County library card catalogues ... no longer in use.


Monday, June 9, 2014

Cheesecake Heaven

Almost twenty years ago, I baked a pumpkin cheesecake for a friend of mine. I followed it up with lemon cheesecake, plain cheesecake, chocolate cheesecake. I'm afraid I was a bit of a cheesecake tease.

He married me -- he says for my cheesecake. And then it all went bad.

My cheesecake-making abilities have ebbed and flowed over the years -- and mostly ebbed. Somehow I have not been able to achieve the height, the lightness, the ecstasy that I aim for. My best rendition in recent years has been the Goat Cheese Mascarpone Cheesecake with Rosemary Rhubarb Sauce (from Grid magazine in Philadelphia), which is totally awesome. (I've even made it with a gluten-free crust for my celiac friend.)

But mostly my cheesecakes have fallen flat. I've taken to cutting them into squares and calling them "cheesecake bars." It's humiliating.

One answer is simply more cream cheese. But that doesn't achieve the lightness I'm looking for. Another is to use a smaller pan -- I've even gotten extreme with a 7" springform pan for ultra-mini-cheesecakes. Which disappear quickly, of course (who can knock the ingredients?), but leave my husband looking around for another cheesecake muse.

And finally -- though I have cursed some of his recipes in recent years -- Mark Bittman came to the rescue yesterday.

A classic recipe -- and it worked!

Lemon Cheesecake with Graham Cracker Crust

About 3 cups of crushed graham crackers
Pulse in Cuisinart with about 10 T. melted butter
(Skip Bittman's 3 T. sugar)

Press into a greased 9" springform pan and preheat the oven to 325 degrees.

4 eggs, separated
3 8 oz. pkgs. of cream cheese
Grated zest and juice of 1 lemon
2/3 c. sugar (reduced from Bittman's 1 cup)
1 T. flour

Beat the egg yolks until light with a mixer or in the Kitchenaid mixer; add cheese, lemon zest and juice, and 2/3 c. sugar and beat until smooth. Pour out into another bowl (if you're using the Kitchenaid) and stir the flour in with a spoon. Wash the bowl and whisk up the egg whites until they hold soft peaks. Gently but thoroughly fold them into the cheese mixture (with a rubber spatula). Turn the batter into the pan and place pan in a baking pan large enough to hold it comfortably.

(This can be tricky -- I used a large flat Lodge enameled cast iron covered casserole. See above.)

Add as much warm water as you can to the larger pan -- you're baking the cheesecake in a water bath. (So your springform pan had better not leak -- I have a new one that locks very tightly.) Transfer carefully to the preheated oven and bake until the cake is just set and very lightly browned, about an hour.

Ideally (unless your daughter is baking lemon bars, which mine was), turn the oven off, take the cheesecake out of the water bath and return to the oven for at least 30 minutes to cool in the cooling oven. Then cool on a rack, cover with plastic wrap, and refrigerate until well-chilled before slicing and serving.

I had planned the cake for a meeting I was having at my house, but my clever daughter made me a deal -- she baked lemon bars for the meeting (we never eat them at our house -- too much sugar!) and we kept the cheesecake for the family. It was truly fantastic -- light and creamy and lemony and a little bit tart. Perfect crust -- not too hard to cut into, as they sometimes are after an hour in the oven, not too sweet, since I omitted the extra sugar. Everyone was delighted -- and couldn't wait for breakfast this morning.

Marriage saved. For now.

Sunday, May 11, 2014

My (Georgian) Hero

Darra Goldstein.

She's amazing. I finally made the Khachapuri in her Winter Vegetarian cookbook (1996, aka The Winter Hearth), and we judged it to be the most authentic Georgian cheese bread of all. It transported us back to the Tblisi restaurant in Warsaw where we had such a lovely meal when our friend Babs visited from the States. Here is a loaf of mine in all its glory:


In fact, I didn't have any "farmer cheese," so for the second cheese I used cream cheese.  (I don't really find the American "farmer's cheese" you can buy in the grocery store to work anyway -- it seems just like Muenster to me. There is another kind of "farmer cheese" I think that is softer, but I don't have access to it.) I worried that with cream cheese the result would be too sweet, but it was fine.

Adding the garlic clove made a surprisingly enormous difference and may very well be where the "authentic" taste came from.

Here we go:

Georgian Cheese Bread (Khachapuri)

3/4 c. milk
2 1/2 t. active dry yeast (= one packet)
1/2 t. honey
6 T. unsalted butter, at room temperature, plus 1 T. melted unsalted butter
1 3/4 t. salt
2 c. unbleached white flour
1/2 lb. farmer cheese (or cream cheese!)
1 lb. Muenster cheese, grated
3 eggs, lightly beaten
1 garlic clove put through a garlic press

Heat the milk to lukewarm. Dissolve the yeast and honey in 1/4 c. of the milk. Set aside to proof for 10 minutes, then stir in the remaining milk. Add the 6 T. butter, 1 1/2 t. salt and the flour, mixing well.

Turn the dough out onto a floured surface and knead until smooth and elastic, about 10 minutes. Place in a greased bowl, turning the dough to grease the top. Cover and leave to rise in a warm place until doubled in bulk, about 1 1/2-2 hours.

To prepare the filling, cream the farmer/cream cheese in a medium bowl (or a Kitchen Aid mixer). Stir in the grated Muenster until well blended, then add the eggs and the remaining 1/4 t. salt. Add the pressed garlic and beat until smooth and light. Set aside.

When the dough has doubled in bulk, punch it down and let it rise again until doubled, about 45 minutes. (If you're me and you're making this for dinner, these steps take too much time. Don't worry -- just make sure the dough rises some.) Punch down and divide into three equal pieces.

Grease 3 8-inch cake or pie pans, says Darra. Or just use a cookie sheet, greased or lined with parchment paper. On a floured surface, roll out each piece of dough into a circle about 12 inches in diameter. Center a round of dough in each pan (or on the cookie sheets). Divide the cheese mixture into three equal parts and place 1/3 of the filling on each circle of dough, mounding in the center. Then begin folding the edges of the dough in toward the center, moving in a clockwise direction, allowing each fold of dough to overlap the previous one, until the filling is completely encased in the pleated dough. Grasp the excess dough in the center of the bread and twist into a topknot to seal.

Preheat the oven to 375 degrees. Let the breads stand for 10 minutes and then brush with melted butter. Bake for about 45 minutes (or much less, depending on your oven -- trust the scent of the bread to know when it is done) or until browned. Slip the khachapuri out of the pans and serve hot or at room temperature.

Darra also suggests mini-loaves with 1 T. of filling each, 12-15 minutes to bake.


I recommend this cookbook -- it is really terrific. Funny that I've had it for years and never searched Khachapuri. I guess I figured that for Georgian cheese bread, I use my Cooking in the Caucasus cookbook, and for Borscht I use this one. By the way, I also recommend Darra's vegetarian borscht, although only if you have a Cuisinart. It has so many vegetables in it that it's extremely hearty and you don't miss the meat at all (how would I know? I haven't eaten meat in over 30 years!), but without an army of serfs or a Cuisinart, you'll never manage the vegetables.

Sunday, April 20, 2014

Bliny po-Leningradski

Leningrad has been gone for a long time, though in these almost-Soviet days it seems a more recent memory than it should. Nowadays, of course, that city on the Gulf of Finland has been renamed St. Petersburg.

I notice, though, that for certain Russians, and for certain memories of those who lived in Leningrad during its Soviet incarnation, the name comes back. I can teach about Dostoevsky's Petersburg or today's, but when I remember 1987, I remember Leningrad.

In our dormitory at Leningrad State University, I lived with two other American students and two Russian students in a two-room "blok" with our own entryway and toilet/shower room. We lived quite amicably, though we were the exception; most of the students on our program did not get along with their roommates.

Our Russian roommates were both from far away: Liudmila from Novosibirsk, Siberia and Nadezhda from Izhevsk, on the far side of the Urals. Nadya turned out to really be from Udmurtia -- from a small village called Iuberki where the inhabitants were Udmurt peasants. (The Udmurts, like many people scattered across the Russian North, speak a Finno-Ugric language as their native tongue and speak Russian only as a second language.)

Eventually -- some five years later -- I would visit Iuberki and meet Nadya's parents and siblings for myself. Their house was amazing -- a peasant hut with a huge Russian stove (which they still used for cooking, along with the gas stove in the passageway). Attached to the house were the various outbuildings -- the barn for the cow, the outhouse -- conveniently connected by passageways so that you didn't have to go out into the cold and snow in wintertime to take care of business. Near the house were elaborate vegetable gardens, a huge hay barn, and a banya. I spent 5 days with the family in summer one year, during haymaking season, and like the suburban girl that I am was allergic to hay and unable to help. The result was that I read a lot of Krestianka (or Peasant Woman) magazines and fixed the house and its environs in my memory. (Wish I'd taken more pictures...)

In 1999 I was in St. Petersburg for the summer with a group of students, and Nadya came all the way to visit to meet my future husband who had also come over, from America. I was renting a two room apartment from a dear friend and thus she was able to stay with us for a few days.

The first thing she did was head to the kitchen to make real Russian bliny for my boyfriend.

Nadya's mother may have taught her to make them in the Udmurt peasant hut; she taught me in the Vasilevsky Island kitchen that quickly began to feel like Leningrad again.

I'm sure she was so skilled that her pans didn't really matter; when I got back to the States I tried to use regular or non-stick frying pans, but ended up buying crepe pans at Williams-Sonoma. I keep them specially seasoned just to make bliny at home -- which when my children were small was literally every weekend, sometimes Saturday and Sunday.

Here's the recipe, adjusted for American conditions:

1 1/2 cups milk
1 egg
about 1 cup of flour
about 1/2 - 1 t. baking powder
a dash of salt
a bit of sugar, depending on how sweet you want them; for me 1-2 T. is plenty

Whisk the milk and egg together and then add to the dry ingredients, whisking well so there are very few lumps. Heat the pans and add butter. (My bliny are as good as they are because I do NOT spare the butter!) Keep the gas at about medium.

Pour on a small ladleful of batter at a time, swirling the pan to get the blin to be thin and round, maybe 6 or 8 inches in diameter. Watch until the bubbles come and the edges curl just slightly. Carefully flip the pancake (find the right spatula for this) and brown the other side. It will only take a few minutes for the first side and maybe a minute for the second. (My daughter used to request "white pancakes," i.e. the ones that came off the pans first, before they really heated up.)

Continue as above, adding butter to the pans every time. (You can do the more economical Russian thing if you want: cut a small potato in half, stab the non-cut side with a fork to make a kind of brush, and dip the cut side into a dish of vegetable oil to oil the pans between pancakes. This works fine and gets just the right amount of oil on the pan -- but it is not as tasty as butter!!!) I keep two pans going, and when a pancake gets stuck or ripped in some way, I sneak it off the pan and eat it bit by bit. (Remember the Russian saying: pervyi blin komom, the first pancake comes out in a lump, and don't despair. You need to get the pans, the butter, the quantity of batter, the spatula just right for it all to work perfectly!)


This recipe makes about 6 or 7 pancakes. You need to keep trying until you figure out what thickness you like and how to achieve it. They are delicious served the American way, in a stack with maple syrup, fork, and knife, and in that case they don't need to be as thin. We tend to eat them as what my son called "roll ups" -- spoon jam or even sour cream on the pancake and roll into a tube to eat with your fingers. For roll ups they taste better when they are thinner!

You can fill them with anything you like. Red caviar is good, but jam or preserves are fine as well. I have a clear recollection of applesauce and sour cream in that Leningrad apartment, but I don't see how it can be correct... Applesauce is not a very Russian dish. Maybe Steve and I made applesauce while Nadya was cooking the pancakes?

I more or less worked this recipe out myself through trial and error; Nadya taught me with a liter of milk and a small bag of Russian flour... not quantities I necessarily want to or can mimic. For the family I usually make two batches; for a crowd I make more.

Last week for my students I think I made five rounds of batter -- so many pancakes that they actually sent half a dozen home to my children for an after school snack!

Saturday, April 19, 2014

Lark Buns

This recipe is a "fasting" recipe, i.e. no animal products. Hmmm... were the Russian Orthodox the first vegans?

Lark Buns 

(for pictures of what the steps look like, consult the recipe I am translating)

For the dough:

  • 2 c. water
  • 2 T. fresh yeast (I used dry...)
  • 1/4-1/2 cup sugar
  • 1 t. "vanilla sugar" (I have bought this in Poland, but has anyone ever seen it in the US?)
  • 1 t. salt
  • 1/2 c. vegetable oil
  • 6-8 cups of flour
  • raisins for decoration
  • vegetable oil or sweet tea to brush buns
To prepare:

Make your yeast dough. Let it rise in a warm place.

Roll out the dough and divide it into 40 pieces. (I actually made 1/2 of this recipe.)

Roll each piece between your hands into a snake and then tie it into a knot. The "head" needs two tiny pieces of raisin for eyes (cut the raisins into small pieces) and pinch the end to look like a beak. Take the "tail" and spread it out a little, cutting "feathers" with a knife.

Place the birds on a greased cookie sheet and let them rise for a while. 

Brush the birds with oil or sweet tea. Bake for about 20 minutes at 350 degrees. When you take them out of the oven, remove from the tray and place on a wooden surface, spritzing them with a little water and covering them up for 10-15 minutes.

Priiatnogo appetita! (i.e. Bon appetit!)

I am going to make these again and try to make them "non-fasting," i.e. with some milk and butter instead of water and oil. And I will definitely take a picture!

Wednesday, April 16, 2014

Green Bean and Coconut Soup ... from Avoca

I really do want to work through the Avoca Cafe Cookbook one recipe at a time ... but my friend says her daughter will kill her if I don't return the book soon.


Last night I took a look at the Green Bean and Coconut Soup. We were late coming home from work, and Tuesdays are always complicated because of piano lessons, so we usually just grab pizza. But I had all the ingredients for this soup, and oddly it had snowed yesterday (on April 15) and was cold out, so this seemed like the right choice. With this cookbook, I never quite know how much the recipes will make, and I decided to vary the quantities as I went and try to bulk up the meal. By adding tofu and rice I turned the "soup" into an easy green curry sauce that was delicious. Next time I'll make double so that we can have some leftovers.

Easy Green Curry Sauce for a Quick Meal in a Bowl

2 T. butter
a bunch of scallions, chopped (whites and greens)
2 carrots, cut into fine strips
2-3 t. finely chopped lemon grass (on the advice of our Vietnamese friend we have frozen chopped lemon grass in the freezer on hand all the time)
4 cloves of garlic, peeled and crushed
2 t. grated fresh ginger
1-2 t. ground turmeric
2-3 t. ground coriander
2-4 green chiles, chopped (or just some pepper flakes if you don't have these)
a large handful of fresh green beans, roughly chopped
2 cans of coconut milk (13.5 oz.)
vegetable stock cube, crumbled

To add in the bowl:
1 cake of tofu, cubed and stir-fried
cooked rice, white or brown

For garnish: fresh bean sprouts and chopped fresh cilantro

Melt the butter in a small soup pot. Add scallions, carrot, lemongrass, garlic and ginger and stir over medium heat for about a minute. Add the turmeric, coriander, chiles (or pepper flakes), green beans, coconut milk and stock cube and mix well. Bring to a boil, and then reduce heat and simmer uncovered for 5 minutes. Season with salt and/or black pepper to taste.

Cook the rice and the tofu separately and then mound them into the bottom of a soup bowl. Pour the sauce on top and garnish with bean sprouts and cilantro.

Yum. This smelled so good cooking that my son was ladling it out of the pot before running off to his lesson. Holding the bowl between bites, and the creamy filling sauce/soup itself, was just the thing on a cold evening.

Will spring ever come? Today I'm baking zhavoronki, the Russian bread-larks, to hasten it. Stay tuned.

Image from gotovim-doma.ru. Will mine be as attractive?

Thursday, April 10, 2014

Avoca Cafe Cheesecake ... in Ohio

My friend is Irish, and she swears by the Avoca Cafe Cookbook. One evening last fall she went on and on about the recipes, about how this was such a great place to go in Ireland, about how this is the only cookbook she uses. So I bought a copy and gave it to my sister for Christmas.

(My sister's husband's family comes from Ireland originally, though their roots in Ohio run pretty deep. Plus they eat meat -- and this is not a vegetarian cookbook. She has tried the Beef and Guiness stew and found it delicious, if extremely rich.)

Then last week, my friend stopped by to invite us to a dinner party and dropped by some cookbooks for me to peruse. (She must have heard of my "guilty habit" of reading cookbooks.) Two Avoca Cafe Cookbooks, and a cake cookbook called Miette. (That one is fantastic. But so far I've only drooled over it -- haven't tried anything yet.) The Avoca cookbook really is wonderful, As most cookbooks do, it starts with the soup section, and I want to try every single recipe. Just my luck that the weather is finally turning to spring...

But then my daughter requested a cheesecake for her birthday. And this presented a certain challenge. Even though my husband swears he married me for my cheesecake, I've been having dubious success over the last few years. Generally when I bake one, I just call it a "cheesecake tart," or I cut it up into "cheesecake squares." In other words, my cheesecakes in recent years have been seriously lacking in height.

And I've tried. I've tried the very slow baking -- 1 1/2 hours at 200 degrees. I've tried leaving the cake in the oven for several hours after it is done, door lightly propped open with a wooden spoon to keep it from falling. But these techniques have failed me ... so far.

The real answer, it seems to me, is to get a 9" or even a 7" cheesecake pan. Or I suppose I could double the recipe. In preparation for the birthday cake, I went to several kitchen shops on Monday and found them all closed; I checked the Macy's on the way home from work, but no luck. No 7" pan was in my (near) future. (I admit it -- I have one on order.)

So I decided to wing it -- from the Avoca Cafe cookbook.

The recipe is unusual, AND it's Irish. So our standard quantities and ingredients don't map onto it perfectly. Since I was determined to have a cheesecake that was higher than an inch, I figured I'd just guess -- substituting ingredients and fudging quantities -- and hope for the best.

Baked cheesecake with lemon topping (modified)

Filling:
1 container small curd cottage cheese (do they come in 15 1/2 oz. containers?)
4 eggs
~2/3 c. white sugar (who has "caster sugar"?!)
16 oz. cream cheese
3 T. corn starch (almost forgot this and added it last -- in Ireland it's called "cornflour")
juice and grated peel of 1 lemon
juice and grated peel of 1 lime
4 oz. melted unsalted butter
2 small containers of heavy whipping cream (no creme fraiche at our country grocery store, and only after I poured the cream in did I look it up on the web, which suggests half as much whipping cream as creme fraiche if you're substituting... oops...)

Crust:
~1 1/2 c. flour
~2/3 c. sugar (this may have been too much -- remember, I was experimenting, and not actually doing the math...)
1 egg
5 oz. soft unsalted butter (okay, maybe it wasn't all that soft...)

Mix all crust ingredients in a food processor. Press half into a greased and lined 10" springform pan (that's all I have at present!) and bake for 10 minutes at 375 degrees. Let cool slightly and press the remaining crust dough on the sides of the pan. In the meantime, lower the oven temperature to 300 degrees.

For the filling, whiz the cottage cheese in the food processor for 20 seconds. I also used my kitchen aid mixer with the whisk attachment, whisking eggs and sugar together for 5 minutes. At this point I think I should have changed to the beater, but I didn't, and just added the cottage cheese and cream cheese. After a bit (and I'm sure the cream cheese was not mixed in properly, but oh well) I added the lemon and lime juices and rind (the recipe calls for zest, but my zester is in my PA kitchen, so I simply grated the rinds). Stir in the melted butter and whipping cream (better 1/2 pint than a whole pint, but I thought of that later, so it was pretty liquid-y!). Which is why when I remembered about the corn starch, I added 3 T. With only 1/2 pint of cream, I would have used 1 T.

Pour the mixture into the pan and bake in a 300 degree oven ... for two hours? When I read that, I reduced my oven a little part of the way through, to about 275. My oven runs a bit hot anyway. The top was definitely browned when I took it out! Leave to cool and chill overnight.

Then the fun part -- today I made the lemon curd after work. Delicious!!

Homemade Lemon Curd

Juice and grated rind of 3 lemons
4 oz. unsalted butter, diced
2/3 c. sugar (who has caster sugar?!)
5 eggs

Put the lemon juice and rind, butter and sugar in a large bowl set over a saucepan of simmering water, making sure the water does not touch the base of the bowl. Leave until the butter has melted and the sugar dissolved, stirring occasionally.

Lightly whisk the eggs, then pour them onto the mixture through a sieve (that was fun!). My glass bowl and Ikea small pasta pot combo worked perfectly, and eventually most of that egg did get through the sieve and into the lemon mixture.


Leave for 40 minutes to 1 hour, stirring occasionally with a wooden spoon. The curd is ready when it's thick enough to coat the back of the spoon. Remove from the heat. (I was making a half recipe; if you did the whole recipe it would probably make 2 pint jars and you could can it.)

This recipe was super easy -- I could essentially do all kinds of other things (like make the birthday dinner of Pad Thai) while it cooked. And it is so tasty! I can't believe I never tried to make it before. I let the lemon curd cool a bit and then spooned it on top of the cheesecake. Which was plenty high -- probably because I doubled all the cheese quantities!
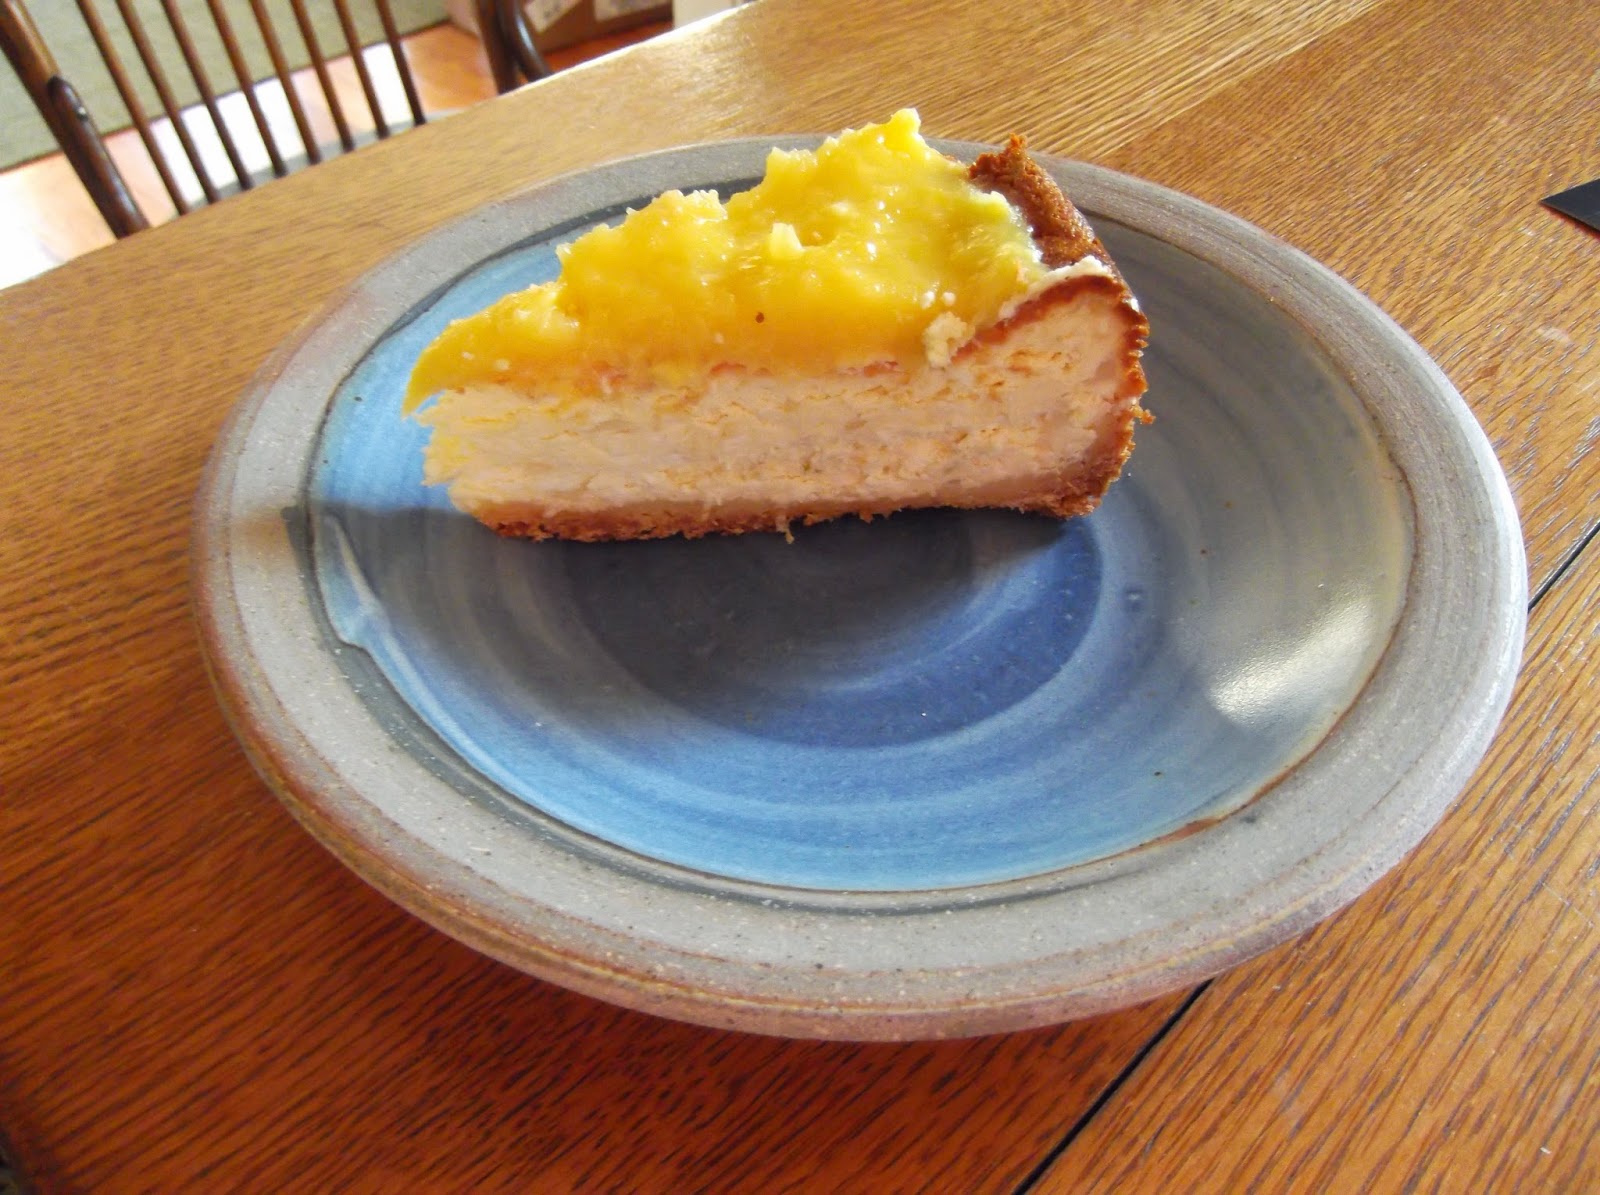
I am happy I have somehow convinced my daughter that cheesecake is the best birthday cake. Tonight reminded me of how fun her birthday was two years ago when we had a bonfire in the backyard and girls running all over -- jumping on the trampoline, zipping across the yard on the zipline, and everyone eating cheesecake. But tonight's cheesecake deserved the name and made the birthday really special. Light and yet dense -- how can that be? And not too sweet -- especially the lemon curd. Yum.